Yahooメールでテスト送信する
XAMPP環境で、Gmail環境でテスト送信しようと思ったところ、うまくいかず。
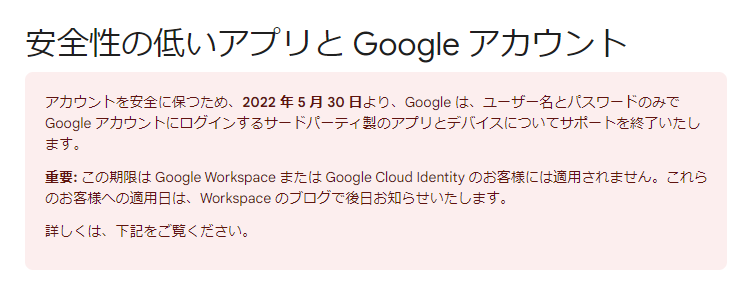
どうも『ユーザー名とパスワードのみで Google アカウントにログインするサードパーティ製のアプリとデバイスについてサポートを終了』したらしい。
2段階認証したアカウントならできるっぽいがテストで使用したくない・・・

ということで、Yahooアカウントでテストメールを送信する方法を紹介します。
yahooの説明を参考にしました。
①php.iniの編集
ファイル「C:\xampp\php\php.ini」を以下になるように編集します。
「mail function」で検索し、以下になるように修正します。
※わかりやすいようにコメント文もそのまま表示しています
[mail function]
; For Win32 only.
; https://php.net/smtp
SMTP=localhost
; https://php.net/smtp-port
smtp_port=25

; For Win32 only.
; https://php.net/sendmail-from
;sendmail_from = me@example.com

; For Unix only.  You may supply arguments as well (default: "sendmail -t -i").
; https://php.net/sendmail-path
;sendmail_path =
sendmail_path = "C:\xampp\sendmail\sendmail.exe -t"
②sendmail.iniの編集
ファイル「C:\xampp\sendmail\sendmail.ini」を以下になるように編集します。
force_senderも設定するのを忘れないように注意して下さい。(auth_usernameと同じものを設定)
※わかりやすいようにコメント文もそのまま表示しています
[sendmail]

; you must change mail.mydomain.com to your smtp server,
; or to IIS's "pickup" directory.  (generally C:\Inetpub\mailroot\Pickup)
; emails delivered via IIS's pickup directory cause sendmail to
; run quicker, but you won't get error messages back to the calling
; application.

smtp_server=smtp.mail.yahoo.co.jp

; smtp port (normally 25)

smtp_port=465

; SMTPS (SSL) support
;   auto = use SSL for port 465, otherwise try to use TLS
;   ssl  = alway use SSL
;   tls  = always use TLS
;   none = never try to use SSL

smtp_ssl=auto

; the default domain for this server will be read from the registry
; this will be appended to email addresses when one isn't provided
; if you want to override the value in the registry, uncomment and modify

;default_domain=mydomain.com

; log smtp errors to error.log (defaults to same directory as sendmail.exe)
; uncomment to enable logging

error_logfile=error.log

; create debug log as debug.log (defaults to same directory as sendmail.exe)
; uncomment to enable debugging

;debug_logfile=debug.log

; if your smtp server requires authentication, modify the following two lines

auth_username=ヤフーのメールアドレス
auth_password=メールアドレスのパスワード

; if your smtp server uses pop3 before smtp authentication, modify the
; following three lines.  do not enable unless it is required.

pop3_server=
pop3_username=
pop3_password=

; force the sender to always be the following email address
; this will only affect the "MAIL FROM" command, it won't modify
; the "From: " header of the message content

force_sender=ヤフーのメールアドレス

; force the sender to always be the following email address
; this will only affect the "RCTP TO" command, it won't modify
; the "To: " header of the message content

force_recipient=

; sendmail will use your hostname and your default_domain in the ehlo/helo
; smtp greeting.  you can manually set the ehlo/helo name if required

hostname=
③mailtest.phpを作成
フォルダ「C:\xampp\htdocs\」に、ファイル「mailtest.php」を作成し次の内容を貼り付け。
『’送信先のメールアドレス’』の箇所には、メールを送る先のアドレスを設定してください。
<?php
if(mb_send_mail('送信先のメールアドレス', 'メール送信テスト:タイトル', 'メール送信テスト:本文')) {
    echo "送信完了";
} else {
    echo "送信失敗";
}
?>
④ブラウザからアクセス
ブラウザから「http://localhost/mailtest.php」にアクセスします。
そうすると送信プログラムが実行されます。
成功した場合:送信完了
失敗した場合:送信失敗
と表示されます。
失敗した場合、「C:\xampp\sendmail\error.txt」にエラー内容がはかれるので、そこから修正して下さい。


